Friday, June 30, 2017

Tastiest best side dish ever

Life is Good: we're keeping it spicy!

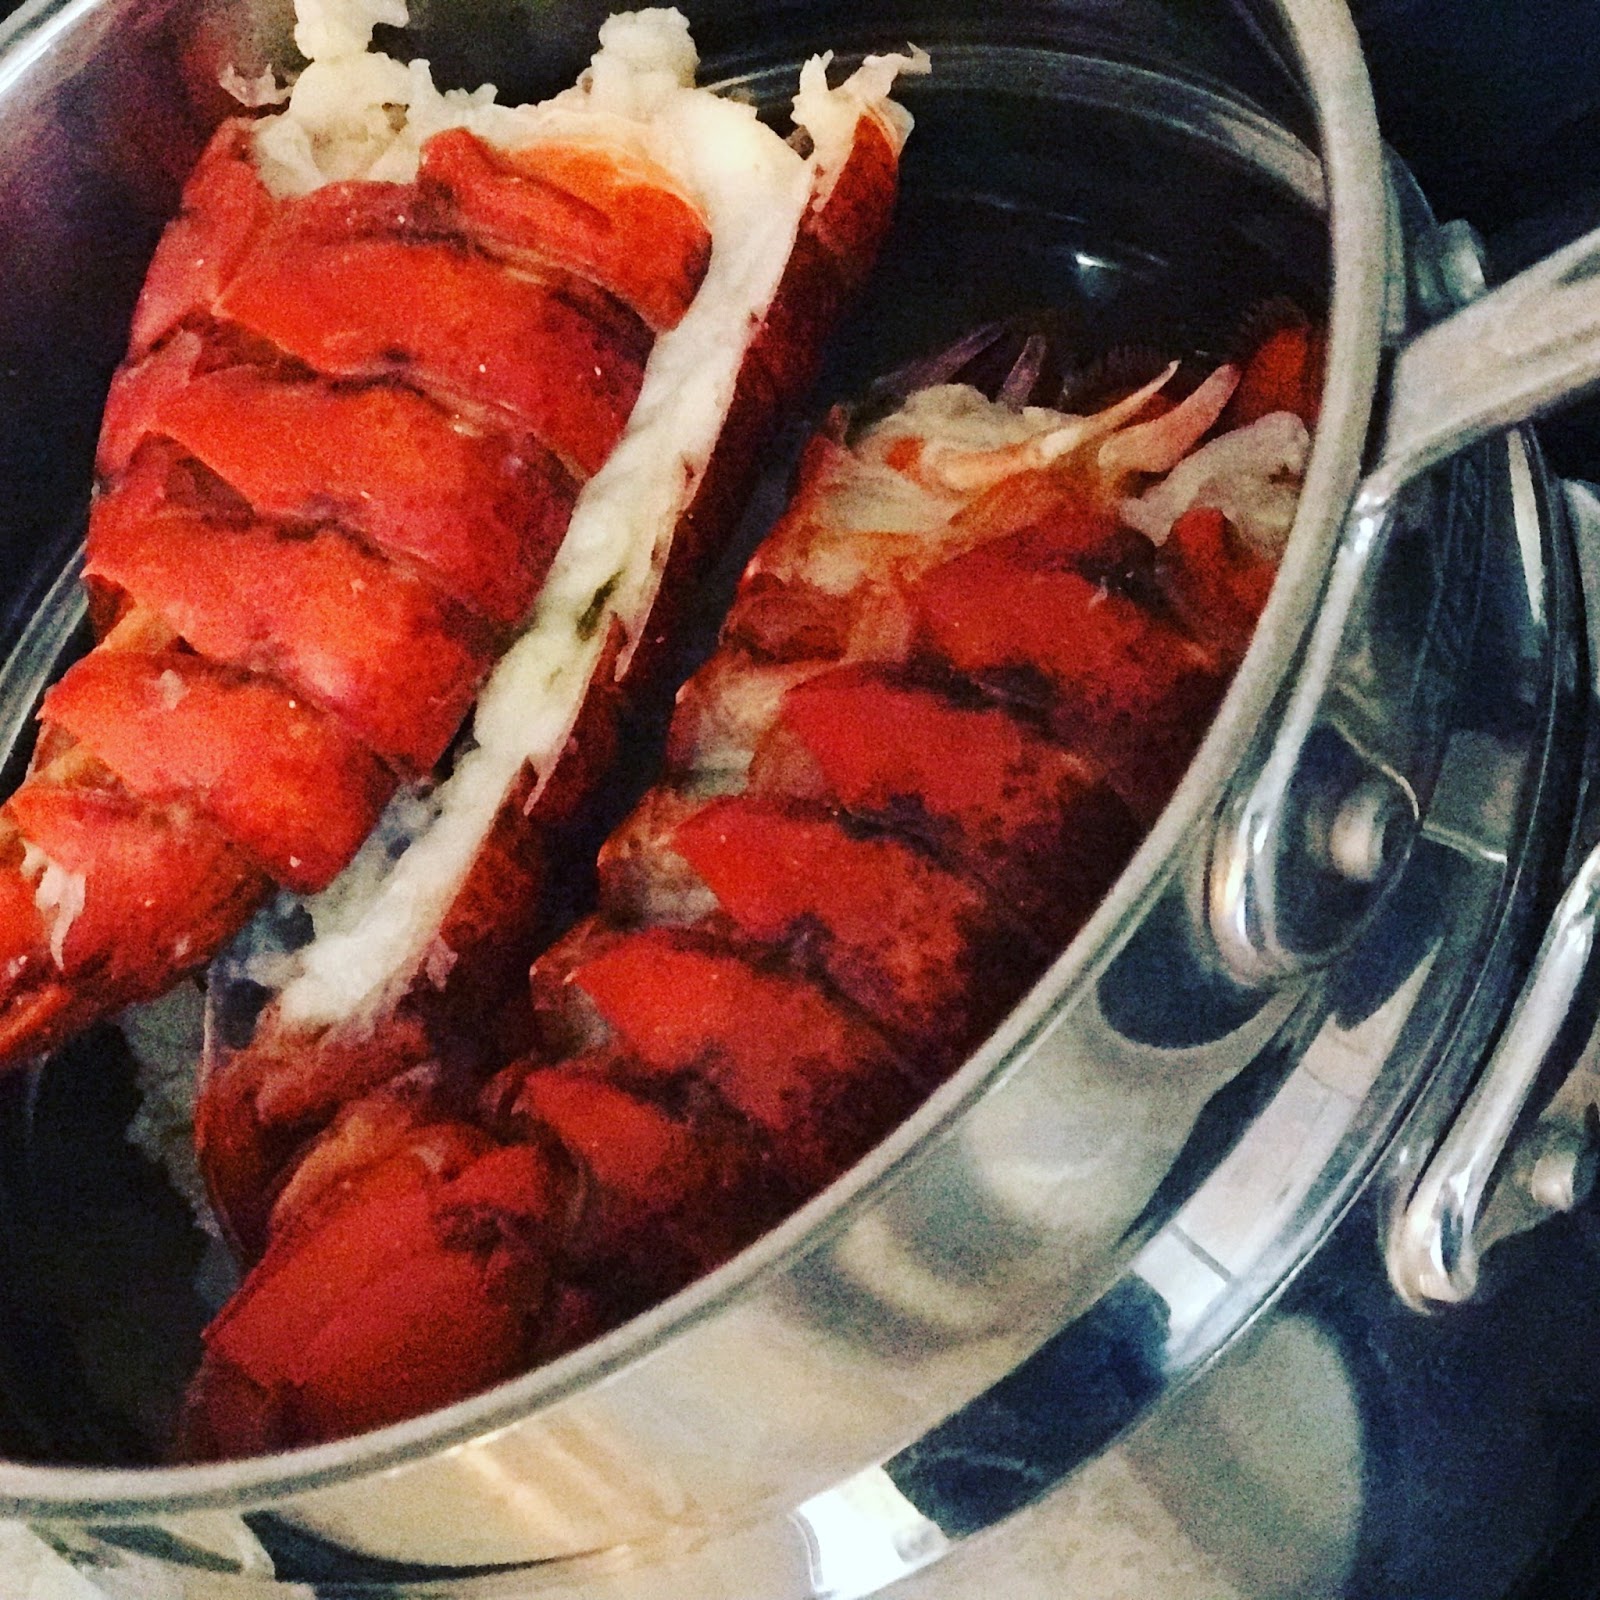
So yesterday I told you about our yummy lobster roll dinner. Today, I want to share with you my latest obsession: tator tots with avocado and sriracha!

Every once in a while, I give in and make "kids food". A couple of weeks ago, we grilled burgers and brats and I picked up a bag of tator tots for the rest of the fam. After I had plated everyone's food, I had some tots left over and out of nowhere, I decided to put some avocado and sriracha on them. Avocado and sriracha are a perfect pairing and I love to put them on turkey burgers. 


Best side dish ever


One bite and I was HOOKED. I mean, HOOKED! I think about eating tator tots with avocado & sriracha first thing in the morning, in the car, oh my. It's delicious! 

It's super easy--just bake the tator tots until crispy. While they're baking, cut open an avocado (cut lengthwise around the entire avocado and pull apart, stab a knife into the seed and pull it out), score it with a knife (kind of like a tic tac toe board) and scoop it out with a spoon, then smash it up in a bowl. When your tator tots are done, put them on a plate, scoop some avocado on top, and then lightly squirt out a few "lines" of sriracha over the top. Soooooo gooooood!

Let me know if you try it!

Thursday, June 29, 2017

Best lobster roll recipe

Life is Good: let the good times (and lobster) roll!

Grant and I are suckers for seafood so it's not surprising that our kiddos are, too! Earlier this week, I surprised everyone with lobster rolls for dinner. It brought back some good memories from our trip last summer to Boston, Cape Ann (commonly known as "the other cape"), and Portland, ME. 

There are, essentially, two kinds of lobster rolls--with mayo and without. Mayo has eggs and our kids are allergic, so that is out. But, frankly, we just prefer the "without" version anyway. Grant and I have sampled our fair share of lobster rolls and as pedestrian as it sounds, the best "roll" is a high-quality hot dog bun. It's just the right amount of doughy goodness without overpowering the taste of lobster.

Here's how I made ours:

1. I started by steaming lobster tails. I use my Calphalon saucepan with steamer like this one (only mine is not non-stick). We got ours in a set for our wedding from Dillards and the set is still in great condition! I simply put a couple of cups of water in the saucepan (with about a teaspoon of pink himalayan sea salt) and then put the steamer on top. I bought a 6 ounce lobster tail for each person in our family. I layered the tails so that the shells touched the pan and then the top tails had the "meat" touching each other so that the shell is what you see when you lift the lid. That way, the lobster meat doesn't get too steamed and therefore, too mushy.

2. Let the water boil for about 10 minutes or until the shells are bright red. (Keep the lid on the pan!)


3. I let my lobster cool (but not get cold). Then I pull out the lobster meat. If some of it is hard to get, I use a knife and a fork to get the rest out. I put all of the lobster meat into a covered bowl and place in the refrigerator until dinner time. (I like to prep my dinners in the morning when the kids are eating breakfast. It makes dinner time less hectic & stressful for me.)

4. At dinner time, I cut the lobster into large chunks (I think you can taste the lobster better this way) and then melt two tablespoons of butter in a pan on low heat. I add the lobster meat once the butter is melted and saute it for about five minutes or until the lobster is warm (be careful not to overcook the meat---it will get tough). 


5. In a separate pan, I lightly toast the inside of hot dog buns. Like the "with mayo or without" debate, toasting the bun is also a preference that is individual as you are. You can spray the pan with Pam, melt more butter, or toast the bread without anything in the pan at all. 


6. Then it is time to plate your lobster rolls! Spoon the meat onto your bun, dividing evenly among your guests (if you can...or if you love lobster as much as I do, you will heap all of it on your one bun and then tell everyone you accidentally dropped it all on the floor and need to order pizza!). ANYWAY! You can eat your lobster roll just like this or if you prefer a more buttery taste, melt one tablespoon of butter per every 3-4 lobster rolls and spoon the butter over all of your lobster meat on the bun. This will make your bun a little more soppy, but many people like it that way. If you do this, I would definitely toast your bun for this version. 

7. Then it is time to eat! Ohmygosh. My mouth is watering!!! 


This week's dinner was especially lovely because we ate outside on our deck. The weather was reminiscent of Martha's Vineyard where Grant and I just might have had our first lobster roll together!


Saturday, June 24, 2017

Red, White, and Blue Desserts for the Fourth of July

Life is Good: our forefathers made sure of it!

I love Independence Day. Maybe it's because it was my due date when I was in the womb? (I arrived a week late and my mom says that I have been trying to make up for it ever since!) Or maybe I'm just naturally patriotic. Either way, I love the holiday---warm sun on my face, pool or lake time, and...dessert! 

Yesterday I shared my yummy-tasty-easy-I mean eeeeeeasy-recipe for eggless individual banana cream pies so today, as promised, I'm sharing how I made red, white, and blue Rice Krispies treats (with all due credit for the idea to our Big Kid--I'm glad he's learning something from me! Party, party!). 

Very important to remember: you will need the ingredients for THREE full recipes of the traditional Rice Krispies treats. 
The recipe for one quantity is:
3 T. butter
1 pkg (10 ounces or 4 cups) mini marshmallows
6 c. Rice Krispies cereal
(So you will need three times everything above to make the Star Spangled Rice Krispies Treats.)

Directions:
1. In a large saucepan, melt butter over low heat.
2. Add marshmallows and stir until completely melted. 
3. Remove from heat. 
4. Add cereal and stir until well coated.

To make Susie's Star Spangled Rice Krispies treats:
1. Make one quantity of Rice Krispies treats.
2. Before you add the cereal, add five drops of blue food coloring to the melted marshmallows.
3. Add cereal and mix.
4. Spray a spatula with Pam spray and fold the blue treats mixture into a 9 x 13 Pyrex dish. Use the spatula to flatten the treats into the dish.

Here is a pic of the first layer. (I did mine backwards---red, white, blue instead of blue, white, red.) I know...it kind of looks like raw meat. I promise it tasted better than that!


5. Make a second quantity of Rice Krispies treats following the traditional recipe.
6. Using your sprayed spatula, add the treats recipe atop the blue layer. (This is your "white" layer.)
7. Make a third quantity of Rice Krispies treats. Before adding the cereal, add five drops of red food coloring to the mixture.
8. Mix in the cereal. 
9. Using the spatula, flatten the red mixture atop the plain (white) treats layer.
10. Allow to cool a few hours.
11. Cut into desired sized pieces. 
12. Marvel at how crafty you are!
13. Enjoy!


Happy Independence Day!


SaveSaveSaveSave

Friday, June 23, 2017

Red, White, and Blue Desserts for Memorial Day or Fourth of July

Life is Good: dig in!

If you're starting to think about Fourth of July desserts, then my recipe from Memorial Day is just what you're looking for!

We had such a fun Memorial Day weekend this year--a little rest & a lot of fun. Part of that fun was spending a day with our Goddaughter (age 10) and her family. We had great weather that was perfect for dads vs. kids baseball and rolling around in the grass. 


We grilled out and had the uber holiday weekend menu--burgers, brats, corn on the cob...super traditional and low key. "Casual" was the name of the game, and that called for an easy but fun dessert.

Our Big Kid informed me that he had THE best idea for dessert: red, white, and blue Rice Krispies treats. I had to give it to him...that was simply brilliant! And I knew the kids would love it. But I wanted something a little more grown up, too, so I decided to make (eggless, of course) individual red, white, and blue banana cream pies, too. Turns out, everybody wanted one of each. Success!

Susie's Red, White, & Blue Individual (Eggless) Banana Cream Pies
Filling Ingredients:
2/3 c. sugar
1/4 t. salt (I use pink Himalayan)
1 2/3 c. milk
1 t. vanilla (I use Madagascar)
3 T. cornstarch
2 T. butter

Directions:
1. Cook the first four ingredients over low heat until smooth. 
2. Slowly, add three Tablespoons of cornstarch--one at a time-- to the mixture, whisking constantly to avoid lumps.
3. Increase your flame to medium and continue to whisk until the mixture thickens.
4. When thick, add butter and whisk as it melts. 
5. Turn off the flame and slice two bananas into the thickened mixture.
6. Gently fold the banana slices into the mixture and allow to cool, but not completely.
7. Transfer cooled mixture into individual serving dishes, layering blueberries then the banana pie mixture, then sliced strawberries for a "red, white & blue" effect.
8. Place in refrigerator to cool completely until ready to serve.

For my Memorial Day banana cream pies, I rolled out pre-made pie crust and used a cookie cutter to cut out stars. I baked them for about 15 minutes (every oven is different, so watch your stars closely) and added them to my cooled "pies" right before I served them.


Tomorrow....my red, white, & blue Rice Krispies treats recipe!


Saturday, June 17, 2017

Giant Samoa Cookie: Father's Day Dessert

Life is Good: and we're celebrating!


So...in April, a Facebook friend of mine (thanks, Joanna!) posted this awesome tastemade.com video of a giant Samoa Girl Scouts cookie and I knew that I had to make it for Grant's birthday. Samoas are his favvvvvvve cookie!

The video looks both totally easy and daunting at the same time. It was several steps, but that was the most complicated (and not really complicated) part of the entire endeavor. The results were keep-this-thing-away-from-me-if-I-ever-want-to-wear-a-swimsuit-again-delicious!

I skipped the video's cookie recipe and used my own sugar cookie recipe because I knew that it is a solid recipe.
To make the Giant Samoa Cookie, first you need to make the sugar cookie recipe:

Elsie's Eggless Sugar Cookies
1 c. powdered sugar
1 c. sugar
1 c. vegetable oil
1 c. butter, softened
4 - 4 1/2 c. flour (use 4 first and add in the last half cups slowly if your dough doesn't seem stiff enough)
2 t. baking soda
1 t. cream of tartar
2 T. vanilla (I use Madagascar)
1 T. arrowroot

1. Preheat oven to 350 degrees.
2. Mix all ingredients together and allow to cool in refrigerator for at least one hour.
3. Roll out dough in between two pieces of waxed paper and then use a plate to cut the dough into a big circle. 


4. Use a coffee cup, placed in the center of your big circle, to trace out the center circle and removed that dough. Use a fork to much a few light holes all over the cookie.
5. Bake at 350 degrees for approximately 20 minutes. (All ovens work a little differently, so start watching your big cookie at 15 minutes to make sure that it doesn't scorch.
6. Allow to cool completely.

While you're baking your big cookie, crisp up 3 cups of shredded coconut (I used unsweetened, but the video calls for sweetened) on the lower rack in the oven at 350 degrees for 10 min. 

Once your big cookie has completely cooled, remove it from your cookie sheet and turn it over so that the flattest side is up.

Next, melt a bag of Enjoy Life (allergy friendly!) chocolate chips in the microwave. (Every microwave heats differently. I think I ended up melting mine (30 seconds at a time to make sure that it didn't scorch) for about two minutes. (This is more chocolate than the recipe calls for in the video. It barely covered my cookie and also, who doesn't want more chocolate?!?!) Pour the melted chocolate over your cookie and use a knife to distribute it evenly across the cookie. Any butter knife will do but these icing spatulas are great to have. When the chocolate is covering the entire cookie, place it in the freezer to make the chocolate harden.

While the chocolate is hardening, melt a bag of Brach's caramels (14 ounces) over low heat with 3 tablespoons of milk & a dash of salt, whisking constantly. 

Pull the cookie out of the freezer and turn it over onto your serving plate/platter so that the (frozen) chocolate side is on the bottom. Spread about 1/3 cup of the melted caramel mixture onto the top of the cookie. 


Then, put all of your toasted coconut into the remaining caramel mixture & stir. Smooth that mixture onto the top of the cookie with a knife.


Finally, melt another cup of chocolate chips in the microwave and then drizzle that melted chocolate on top of your Giant Samoa Cookie. 


Drizzling methods are as unique as the cook or baker doing them. You can use a knife loaded with melted chocolate or a fork or whisk. If you like to have a lot of control over your drizzle, you can buy a condiments squeeze container to use as your drizzler. 

And then it's time to cut a slice and dig in!!! I often question how "simple" online video recipes really are, but this one did not disappoint. And so yummy. 

I made this for Grant's birthday, but it would be a perfect Father's Day surprise! 


Thursday, June 15, 2017

What to do when your kids are bored this summer

Life is Good: so good, it's super!

One of my biggest struggles as a mom is allowing my kids to be bored. I'm an idea person--by trade and by nature. And I love brainstorming ideas with my kids. But I know the value in uninterrupted free time and letting your mind wander. So this summer, one of my goals is to give my kids the opportunity to be "bored" a little bit. 

So far, we are just under a week into summer and the Big Kid and Little Kid haven't been too bored because they've been doing a theatre camp each morning. Afternoons are spent outside (ahhh, sunshine!) until our Little One takes his (mid-afternoon) nap. Then I get some nice quality time with the older kids without the constant interruption of a two-year old. (In his defense, it is important that I repeat every single word in his vocabulary back to him. Twice. Every minute of the hour. Sigh.) But once the Little One is napping and a quieter time begins, I have disappeared (ever so quietly & carefully) here & there so that I am not an open encyclopedia of ideas. The results have made me squee with delight. The Big Kid devoured The Hobbit. The Little Kid read Bird & Squirrel again. Lego creations were devised and constructed. The Little Kid hosted us at his (pretend) cafe. More than once, I found them playing together, laughing together, reading on the Big Kid's bed together. And this...

Out of a bin of construction paper in our mudroom closet and with the aid of a glue stick, scissors, and an ink pen, Superman emerged. 
Happy (not boring) Summer!
SaveSave

Tuesday, June 13, 2017

Songs to Sing to Babies

Life is Good: our memories remind us so

I heard this song on the radio this morning. It used to be one of the songs that would lull our second born to sleep as a baby. ❤️ In case no one has told you today, "you're beautiful...like a rainbow."


Monday, April 24, 2017

Best Wacky Cake Recipe Ever

Life is Good: blow out the candles & make a wish!


Ever since we found out that our eldest son was severely allergic to eggs (when he was nine months old), making cakes and cupcakes has been a challenge. Early on, I made carrot cakes and carrot cake cupcakes. I felt like they were healthy for cake and they seemed to please everyone (except one little partygoer who seemed to like fewer things and fewer people than any other kid I'v known). As our kids got older, they wanted other kinds of cakes and I figured that out as well as I could but getting the cake dense enough without being too dense was always a challenge. A couple of years ago, our Big Kid asked for a white cake and so I turned to a "wacky cake" or "Depression cake" recipe to make it happen. He was happy, but was not satisfied. I started a quest to find the best recipe. And I think I found it in a thread on an allergy website. 

The recipe was posted by "Kathy P" and I am ever so grateful. Her original recipe is great. Since then, I have adjusted the flavoring a little and this cake is finally one that I don't judge over and over in my head as I watch people eat it. The flavoring is my attempt at what my Grandma's secret ingredient wedding cake tasted like. It's not exactly like hers because I don't use that secret ingredient. Because, well, that would not be secret, right?! But it's close...

One of the differences in this recipe versus other wacky cake recipes is that most of the recipes ask you to make holes in the dry ingredients and pour the wet ingredients into the holes. This recipe mixes the wet ingredients in a separate bowl and then mixes them with the dry ingredients to combine. For some reason, this makes the batter look different and the cake taste different. I hope you enjoy it!

Ingredients:
1 1/2 cups flour
1 cup sugar
1 t. baking soda (make sure it is fresh)
1/2 t. salt (I use pink Himalayan)

1 T. white vinegar
5 T. vegetable oil
1 t. vanilla (I use Madagascar)
1/2 t. lemon extract
1/2 t. almond extract
1 cup cold water

Preheat the oven to 350 degrees.
1. Mix the dry ingredients together.
2. Mix the wet ingredients together.
3. Mix wet and dry ingredients together with a spoon until smooth. Do not use a beater or mixer. 
4. Pour into an 8 inch square or round cake pan OR muffin/cupcake tin (this recipe makes twelve cupcakes).
5. Bake cake for 35 minutes (check often as ovens vary) or approximately 20 minutes for cupcakes.

We celebrated our Big Kid's ninth birthday (NINE!) once already. He asked for "Captain America's shield". Ugh. It's his birthday, it's my "humiliate yourself by showing off your lack of the cake decorating gene" day! 
I was slightly less embarrassed about this decorated cake, though since it was just a couple of frosted rings and a star. I used a saucer as a guide for my first ring around the cake, which made the subsequent rings easier to keep even. I used a star cookie cutter as a guide for my star and then added some layers around that to make it bigger. 


Next up...a trio of cakes for our family birthday celebration. The Big Kid wants a baseball cake, a basketball cake, and a Pokeball cake. WISH ME LUCK!

Saturday, March 4, 2017

Perfect Gifts for Teachers

Life is Good: it's the weekend!

Wow. What a week. It felt like it had a couple of extra days in there! If I'm going to get extra days, I would like them to be on the weekend, please! We had special celebrations for our read-athon that wrapped up (I won't be sad to have one less thing to do and stop logging in to that website.), teacher conferences, a houseguest, and our third grader's teacher's birthday.

As the room mother for both our 5- and 8-year old's class, I feel like I am constantly asking parents for donations and that feels icky. I want to help the school out, but I also hate making families feel pressured. We appreciate the teachers so much and want to give them gifts that are useful, memorable, show our appreciate, and are things that they like. 

For Christmas, we took donations from class families and gave the teachers VISA gift cards. I put them inside of a little bag and tied it with a pretty ribbon and a special Christmas ornament. A note thanking them for the important work they do finished it up. I feel like this works well. Instead of 20 families giving a small gift to the teachers, they got one pretty big gift that they can then choose how to spend. 

For our Little Kid's teacher's birthday, I suggested that we have each child draw a picture of the teacher and sign it and we could bind them all together into a book. One of the other room mothers offered to take on the project. She ended up taking photos of each piece of art and loaded it into Walgreens.com to make an inexpensive book from there. I've also seen great books like this from shutterfly.com and mixbook.com.

Here's the drawing that our Little Kid did of his teacher. I think it looks a lot like her! (And a little bit like a Cubist painting?)


For our Big Kid's teacher, the other room mother asked a local florist, Excelsior Florist, to make a little bouquet of flowers for the teacher's desk. They did an amazing job with lots of springy bright colors and even some butterflies. It looked great. We had each student sign a card and we also asked each child to give a descriptive word about the teacher which I then used to create a word cloud, also known as a wordle. I work on a Macbook Pro, so I found it a bit difficult to use some of the word cloud sites, though there are lots of them. I did a search on google to find a site that worked well with Macs. Even then, I had problems with a couple of sites not saving my files, etc. I ended up going with tagxedo. It has lots of shape options and color choices. You can also choose to have a word used once or repeated. I chose to repeat so that the entire shape was filled up. I tried it out a few times before I got the final one. 


I used a color scheme called "Quiet Morning". I really liked the shades of blue. I also thought it was hysterical to use a color group with this name knowing that it was going in a room of (LOUD) third graders!

Here's the (almost) final:


I picked a more pronounced-looking heart and for the final, added the words, "From your third graders 2017" and also "Happy birthday". His teacher seemed to like the gesture and the kids were so excited about it!

I did have one big snafu with this site. It prints out with a border and a copyright. I wanted to print this out at 50% so that the frame (this one from Michael's) was not gigantic and more of just a little memento. I ended up having to print it out, use some correction fluid (that still make that stuff!?!), and then make a copy of that. It wasn't perfect, which really bothered me since it was a gift, but in the end, it worked. And it was something I could do for under $25 and not ask the class families for a donation. 

And now the week is done, it's Saturday. Time for pancakes and board games and batting practice even though it's a bit cold still outside. Time for puppet shows and little boys running the house giggling. Life is good. 

SaveSaveSaveSaveSaveSaveSaveSaveSaveSaveSaveSaveSaveSave

Monday, February 13, 2017

Valentine's Day treats for kids with allergies

Life is Good: chocolate is love


Thanks to my mom, one of my love languages is food. She learned it from her mom and so on. Every special occasion, since I an remember, has been marked by a cake that was decorated to look like a hamburger or a pizza or even the big bad wolf & the three pigs (and don't forget their houses of straw, sticks, and bricks). If it isn't a cake, it's cookies in the shape of ice cream cones or baseball bats & hats, or Ninja Turtles. Or it's homemade caramels or toffee or decadent chocolate fudge. Oh, it is a wonder we don't all weigh 500, 000 pounds!

So it isn't surprising that food is one of my love languages. And though I find Valentine's Day to be a bit silly, (Shouldn't we show our love for one another EVERY day?) I do like making it a wee bit special for our kiddos. Today, I marked chocolate-covered strawberries off of the list (for surprises in their lunch bags tomorrow) and a new, healthier version of a crunch bar heart.


In the past when I've made homemade crunch bars, I melt Enjoy Life chocolate chips and mix them with Rice Krispies cereal in some kind of shaped mold. Last week, I saw a great idea on Instagram from Well Plated. She puffed quinoa and used that as the "crunch". So this morning, I melted my Enjoy Life chocolate chips (from Target) and added puffed red quinoa. I haven't tried it out, but the puffed quinoa itself was AMAZINGGGGGG! Yummy! I am a sucker for quinoa in all forms!


I didn't measure the quinoa or the chocolate. If you want measurements, post a comment here or on Facebook. I poured the quinoa in my cast iron pan and put my heat on low so as not to scorch the quinoa. I knew it was done when I heard quiet "pops" like a super quieter version of popcorn popping. I tried this two ways...A layer of chocolate, a layer of quinoa, and a layer of chocolate over it and then secondly, mixing the quinoa in the melted chocolate and pouring it into the mold. I used cookie cutters and a sandwich cutter as my "molds". I will report back if either worked better.


Happy almost Valentine's Day!

Friday, January 20, 2017

Kombucha

Life is Good: even though I'm thirsty!


I'm all out of my favorite lemonade Kombucha. And so is the grocery store! What ever will I dooooooooo? 
But seriously, I am so obsessed and addicted to this tasty goodness! (And I'm pretty sure my gut is healthier because of it.)


Thursday, January 19, 2017

#Boymom

Life is Good: I feel the love


You know it's going to be a good day when your five year old leaves you a love letter before he goes to school.


Saturday, January 14, 2017

Eggless Lemon Ricotta Pancakes Egg Free Recipe

Life is Good: when you make time for pancakes!

Our kids would eat pancakes every morning if they could. I've taken to prepping the dry ingredients for my fluffy, eggless pancakes recipe and keeping it in the pantry to make pancake making quicker and easier and more spontaneous. I separate the dry mix into fourths and then I can mix up a quarter of the wet ingredients each time I make their breakfast. 

Every Saturday morning is ruled by The Big Kid's basketball practice. Today, we had a scheduled that allowed time for pancakes. And since our kiddos love anything lemon, I decided to try a new recipe--Lemon Ricotta.

I searched for a vegan recipe instead of substituting the eggs in a regular lemon ricotta recipe. I typically use baking powder & unsweetened applesauce to substitute, but I was afraid it might affect the tartness of the lemons.

I found this recipe through a google search. As it turns out, this blogger is in Minnesota, too! Fun! I adjusted her recipe slightly to fit our family's needs. It worked really well! Here is my version, which makes over three dozen half-dollar pancakes:

3 cups all-purpose flour
1/2 cup sugar
3 t. baking powder
1 1/2 t. baking soda
3 cups milk (I used whole, organic)
1 1/2 cups ricotta cheese
zest of two lemons
2 tablespoons lemon juice

Directions:
1. In a large mixing bowl, stir together all dry ingredients and make "a well" in the center. 
2. Pour in the milk.
3. Add ricotta one large spoonful at a time , mixing gently and being careful not to over mix (which will make the batter tough when cooked). 
4. Spray your pan with Pam and make sure that your griddle or pan are good and warm (but not scorching hot) before you drop the batter onto the pan.
5. Use a tablespoon or small ice cream scoop to measure out the pancakes onto the pan. 
6. When bubbles appear on the uncooked (top) of each pancake, it's time to flip it over to the other side.

I served our lemon ricotta pancakes with a dusting of powdered sugar and whipped cream. Because...Saturdays!


Friday, January 13, 2017

Friday Funday

Life is Good: so laugh a little!

Because...Friday!


He's obsessed with this wig. He calls it a hat. And pronounces "hat" like he's British. ??? He even fell asleep wearing this the other day. I tried so hard to snap a good pic of it, but I woke him up in the process! He's just under 26 months old and excelling at being a two-year old! I don't know if it is his nature or if it is that he is the third child, but he truly believes there is nothing he cannot do. And he will do it all...wearing this "hat"!

Monday, January 9, 2017

Mondays are for Lasagna

Life is Good: dinner was great

Oh, man. Mondays are rough! Luckily, I had a lasagna in the freezer that I popped out to thaw this morning. I feel like end of days go best for us when I have prepped dinner at breakfasttime. I'm no morning person. Let me say that again. I. am. no. morning. person. However, that extra few minutes that I get up to prep dinner is always worth it. 

I got my beloved lasagna recipe from the dearly, departed Gourmet Magazine. I still have a couple of years of them in my kitchen cabinet. Oh, that was a great mag! Anyhoo... here's the recipe, adjusted because of our allergies to egg (you'll never miss it!).

And yes, our two-year old ate as much lasagna as his daddy did! If that isn't a great review, then what is?!


Gourmet Magazine's Sausage, Basil, and Cheese Lasagna
Sauce Ingredients:
  • 2 tablespoons olive oil
  • 1 pound ground pork (plain if you don't like spice or Italian spicy if you do)
  • 1 cup chopped onion
  • 3 large garlic cloves, chopped
  • 2 teaspoons dried oregano
  • 1/4 teaspoon dried crushed red pepper (I leave this out when cooking for others because Minnesotans don't usually like spicy flavors.)
  • 1 28-ounce can crushed tomatoes with added puree
  • 1 14 1/2-ounce can diced tomatoes with green pepper and onion (do not drain) (or plain diced tomatoes)
Filling Ingredients:
  • 1 1/2 cups (packed) fresh basil leaves
  • 1 15-ounce container plus 1 cup part-skim ricotta cheese
  • 1 1/2 cups (packed) grated mozzarella cheese (about 6 ounces)
  • 3/4 cup grated Parmesan cheese (about 2 ounces)
  • 1/4 teaspoon ground black pepper
Assembly Ingredients:
  • 12 no-boil lasagna noodles from one 8-ounce package
  • 3 cups (packed) grated mozzarella cheese (about 12 ounces)
  • 1 cup grated Parmesan cheese (about 3 ounces)
  • Nonstick olive oil spray
Directions:
Sauce:
Heat oil in heavy large pot over medium-high heat. Add sausages, onion, garlic, oregano and crushed red pepper and sauté until sausage is cooked through, mashing sausage into small pieces with back of fork, about 10 minutes. Add crushed tomatoes and diced tomatoes with juices. Bring sauce to boil. 

Reduce heat to medium and simmer 5 minutes to blend flavors. Season with salt and pepper. (Can be made 1 day ahead. Chill until cold, then cover and keep chilled.) 

Filling:
Using on/off turns, chop fresh basil leaves finely in processor. Add ricotta, mozzarella, Parmesan, egg (we leave it out), 1/2 teaspoon salt and 1/4 teaspoon pepper. Using on/off turns, process filling until just blended and texture is still chunky. 

Assembly:
Preheat oven to 375°F. Spread 1 1/4 cups sauce in 13x9x2-inch glass baking dish. Arrange 3 noodles on sauce. Drop 1 1/2 cups filling over noodles, then spread evenly to cover. Sprinkle with 3/4 cup mozzarella cheese and 1/4 cup Parmesan cheese. Repeat layering of sauce, noodles, filling and cheeses 2 more times. Top with remaining 3 noodles. Spoon remaining sauce atop noodles. Sprinkle with remaining cheeses. Spray large piece of foil with nonstick olive oil spray. Cover lasagna with foil, sprayed side down. 

Bake lasagna 40 minutes. Carefully uncover. Increase oven temperature to 400°F. Bake until noodles are tender, sauce bubbles thickly and edges of lasagna are golden and puffed, about 20 minutes. 

Transfer to work surface; let stand 15 minutes before serving to ensure your pieces cut neatly.


NOTE: Grant and our kiddos like a lot of sauce, so I usually double the sauce and add some extra on their plates. Any that is left over from that makes a great spaghetti sauce.


Saturday, January 7, 2017

How to Be Happy

Life is Good: God's Got This


I was talking with a friend about how hard we are on ourselves--as mothers, as wives, as daughters. Some of us try to be everything to everyone and of course, we are setting ourselves up to fail. And if you're like me, the failure brings on such deep feelings of regret and guilt. I love this quote. It's a reminder that we are beautiful, imperfect souls created NOT to be everything to everyone. For me, this new year is about showing myself the love & understanding that I give so freely to others. I'm a work in progress...


Thursday, January 5, 2017

My Beauty Tips

Life is Good: I have everything I need


If you read this post's title and laughed at the thought of me giving beauty tips, then we are kindred spirits! ; ) Right now, with a 2, 5, and 8 year-old, I am lucky to wash my face in the shower each day. I don't know the latest wrinkle cream, youth serum, or natural rejuvenator. Right now, I am just too tired at the end of the day to do anything more to my face than let it hit the pillow. I regret that each morning when I look in the mirror. But I forget that part by the end of the day! Ha!

So, for now, these are my beauty tips...


credit: https://www.vivideditions.com/products/audrey-hepburn-quote-2-watercolor-art?utm_campaign=Pinterest%20Buy%20Button&utm_medium=Social&utm_source=Pinterest&utm_content=pinterest-buy-button-198520cd0-731d-4e04-adb7-29a4e87aadf9

Tuesday, January 3, 2017

Easy Snowman Cheeseball Recipe

Life is Good: and cheesy!

While I was under the weather, I spent some time looking at what was "Pinteresting". I also downloaded what seemed to be MILLIONS of photos!

Here are some scenes from Christmas:


Our annual pics in front of the fireplace of stockings. My mom made a stocking out of felt for everyone in the family. I've lost count...they've totally taken over. 


Yes, you might notice we have one little Santa missing. You must be lightning fast to photograph our 2-year old these days!

Lego Nexo Knights were the big hit of our holiday.


The Lego art wall at Kansas City's Legoland Discovery Center included an homage to Princess Leia. We visited a day or two after the passing of Carrie Fisher


Here's a peek along the highway. Somewhere between Minnesota and Iowa...


And the only snow we saw on Christmas...my snowman cheeseball! Quite possibly, the easiest cheeseball recipe ever! Just blend together a softened block of cream cheese, two cups of shredded cheese (I prefer sharp cheddar for this, but I used mozzarella so that I could make it into a snowman), and 1 packet of Hidden Valley Ranch salad dressing seasoning. Then, spray your (clean) hands with Pam spray (so that the cheese doesn't stick to them) and divide the mixture into three portions: one large, one medium, and one small. Roll each portion into a ball and place on a platter. In my case, I didn't have a large platter to use (all of my mom's had food on them!) so I made the balls all the same size. Add craisins for the eyes and raisins or olives for the buttons. I cut a small piece of orange bell pepper for the nose. You could also use a baby carrot. If you wanted, you could use a strip of a flat fruit snack to make a scarf or a hat. Add crackers and you're ready for a winter party!


This is a garlicky, salty cheeseball. I like it that way, but if you need to, you can double the cream cheese (2 blocks) and shredded cheese (4 cups) to lessen the flavor of salt and garlic. 

Happy Holidays!
SaveSaveSaveSaveSaveSave

Monday, January 2, 2017

Top Pinterest Posts

Life is Good: I'm feeling better!

Admittedly, I don't usually admit to being sick. (See what I did there? wink!) But this past month really threw me for a loop and so, the past couple of days, our last ones of winter break, I have been trying to spend more time resting. It was a bit easier to do this since the kids had lots of new toys to keep them busy! ; ) But of course, I was bummed that we didn't do some of the fun cooking & art activities that I had planned. Next weekend!

So while I was attempting to lounge, I caught up on some reading and visited my old friend, Pinterest.  Here are a few things I pinned:

A whole lotta Valentine's Day school party craft ideas. Like this one


And you know I love me some QUOTES! ; )


There are a ton of great quotes on this site.

I've also been pinning a bunch of Lego builds like this one. Because they occupy our world so much now, we might as well change our last name to Lego!


And of course I'm pinning ideas for a trip to London with the kiddos, organizational stuff, and recipes I want to try to convert to eggless. If you want to see everything I've been pinning, just go here

Sunday, January 1, 2017

How to Sleep Well

Life is Good: rest easily


The first day of the new year is in the books!


How to Make 2017 a Happy New Year

Life is Good: we are a fresh lump of clay ready to become anything!


Since we are a house full of sickies, I was perusing the interwebs last night and found this gem. I think it is perfect for the first day of a new year.


My wish and my prayer for any eyes that fall upon this post is that 2017 is filled with joy, good health, and peace. GLYASDI.


credit: https://s-media-cache-ak0.pinimg.com/originals/d8/ad/73/d8ad73379ff36914384b85dbfab0e30c.jpg